Embedding View Controllers
Table of Contents
Intro
Good code delegates responsibility to the objects responsible for that code. It just makes it easier for others to understand and reason about, especially in large projects.
However, a common practice is to place a UITableView as a view within a UIViewController and then set the delegate and dataSource of the table view to the view controller. In some situations, this is perfectly fine. However, if you want to segregate your code with a logical grouping, it’d make sense to have a UITableViewController manager a table view and a UIViewController manage a regular view. The catch is, how do you combine them when you want to have both on the same screen?
The answer is embedding! It’s actually quite simple.
Breakdown
- In this scenario, you have a
UIViewController and UITableViewController
- (by no means is this exclusive to this exact combo, but it is a common scenario)
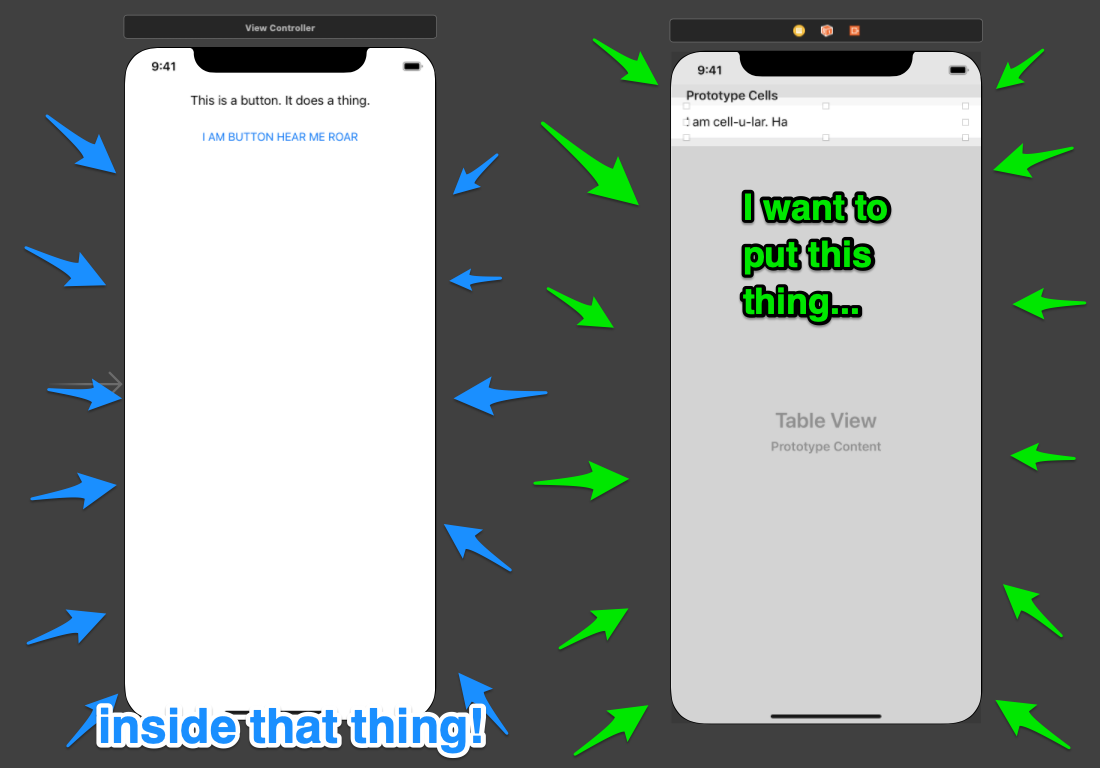
- Place a Container View in the view controller you’d like to make the parent…

- Delete the additional View Controller it creates
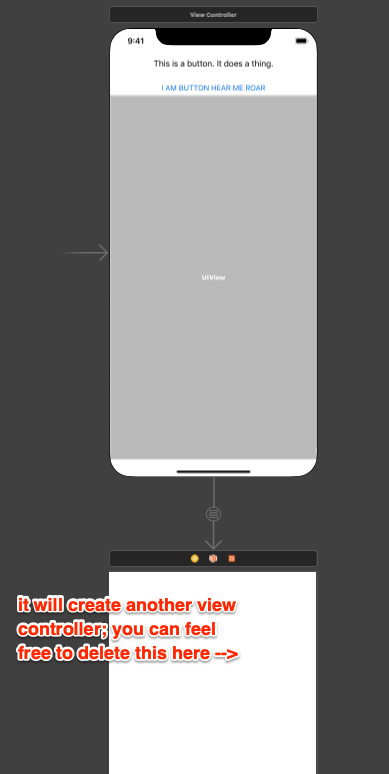
- notice that it states that it’s simply a
UIView. Under the hood, this is the case, but Interface Builder won’t work unless we use an explicit Container View :/
- Finally,
{right-click}-drag or {control}-drag from the container view to the view controller you’d like to embed within. When you let go, choose embed
-
That’s it! Or, it can be if you don’t care about passing data back and forth. If you do, continue on!
Segue Setup
To get the two View Controllers to talk to each other, it won’t take too much work, but before we do that, you need to set an identifier on the segue between the two controllers:
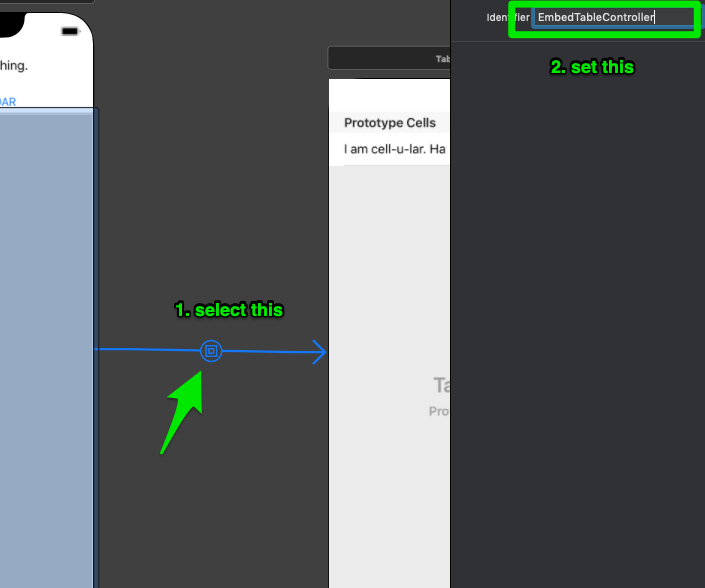
You can set the identifer to anything you wish, just as long it’s unique amongst segue identifiers… But just be sure to name it something logical.
Here’s the code:
class ViewController: UIViewController {
    var embeddedTableViewController: EmbeddedTableViewController? { // you remembered to create and set the class for your table view controller, right?!
        didSet {
            embeddedTableViewController?.muhDatas = ["Yo dawg, I heard you like embedding view controllers, so I embedded a view controller in your view controller so you can control views while you control views."]
        }
    }

    override func prepare(for segue: UIStoryboardSegue, sender: Any?) {
        if segue.identifier == "EmbedTableController" {
            guard let dest = segue.destination as? EmbeddedTableViewController else { return }
            embeddedTableViewController = dest
            // now I can access the embedded controller and give it data or make it respond to button presses or whatnot
        }
    }
}
In this code, the following happens:
- We create a variable to hold a reference to the embedded view controller (you remembered to subclass it, right?!)
- We add a
didSet observer to this reference to immediately provide it with data after being set.
- The
prepare(for segue) function is used to create the link between the two controllers.
- That’s really about it… Everything beyond this is an implementation detail. Set up data passing in a reasonable, logical way.
Cheat your way to success
If you’d like a copy of the code, it can be found on the embed-viewcontroller branch of my BlogDemo repo.
Now to make an InceptionController…
Intro
Good code delegates responsibility to the objects responsible for that code. It just makes it easier for others to understand and reason about, especially in large projects.
However, a common practice is to place a UITableView as a view within a UIViewController and then set the delegate and dataSource of the table view to the view controller. In some situations, this is perfectly fine. However, if you want to segregate your code with a logical grouping, it’d make sense to have a UITableViewController manager a table view and a UIViewController manage a regular view. The catch is, how do you combine them when you want to have both on the same screen?
The answer is embedding! It’s actually quite simple.
Breakdown
- In this scenario, you have a
UIViewControllerandUITableViewController- (by no means is this exclusive to this exact combo, but it is a common scenario)
- Place a Container View in the view controller you’d like to make the parent…
- Delete the additional View Controller it creates
-
- notice that it states that it’s simply a
UIView. Under the hood, this is the case, but Interface Builder won’t work unless we use an explicit Container View :/
- notice that it states that it’s simply a
- Finally,
{right-click}-drag or{control}-drag from the container view to the view controller you’d like to embed within. When you let go, choose embed
That’s it! Or, it can be if you don’t care about passing data back and forth. If you do, continue on!
Segue Setup
To get the two View Controllers to talk to each other, it won’t take too much work, but before we do that, you need to set an identifier on the segue between the two controllers:
You can set the identifer to anything you wish, just as long it’s unique amongst segue identifiers… But just be sure to name it something logical.
Here’s the code:
class ViewController: UIViewController {
var embeddedTableViewController: EmbeddedTableViewController? { // you remembered to create and set the class for your table view controller, right?!
didSet {
embeddedTableViewController?.muhDatas = ["Yo dawg, I heard you like embedding view controllers, so I embedded a view controller in your view controller so you can control views while you control views."]
}
}
override func prepare(for segue: UIStoryboardSegue, sender: Any?) {
if segue.identifier == "EmbedTableController" {
guard let dest = segue.destination as? EmbeddedTableViewController else { return }
embeddedTableViewController = dest
// now I can access the embedded controller and give it data or make it respond to button presses or whatnot
}
}
}In this code, the following happens:
- We create a variable to hold a reference to the embedded view controller (you remembered to subclass it, right?!)
- We add a
didSetobserver to this reference to immediately provide it with data after being set.
- We add a
- The
prepare(for segue)function is used to create the link between the two controllers. - That’s really about it… Everything beyond this is an implementation detail. Set up data passing in a reasonable, logical way.
Cheat your way to success
If you’d like a copy of the code, it can be found on the embed-viewcontroller branch of my BlogDemo repo.
Now to make an InceptionController…